Most people looking to troubleshoot their internet connection are faced with the issue of Wi-Fi signal strength. Although it is a generic diagnostic, checking the strength of the wireless network on the device can be one of the easy ways to resolve slow connections or intermittent internet crashes.
It is useless to subscribe to a very high speed broadband if the Wi-Fi signal suffers interference until it reaches the device. For this reason, it is recommended that the router be in a high place (the signal is transmitted from top to bottom), in a central point of the home, and in an open room — the fewer walls, the less interference.
These simple tips can be important, even more so with the growth of the home office regime adopted due to the coronavirus pandemic. Still, it is necessary to pay attention to the strength of the Wi-Fi signal and, if necessary, study changing the position of the router.
Listed below are four tutorials on how to check the Wi-Fi signal strength on computers running the Windows 10 operating system. The measurements can certainly help in optimizing the network connection.
Use the taskbar
The easiest way to check the strength of your wireless connection is to look at the network icon located in the taskbar itself.

Click on the icon and check the status of the connected network. The logic is simple: the more “scratches”, the greater the Wi-Fi intensity and, consequently, the greater the connection speed.

If you want to take the test, just grab your notebook and walk through every room in the house. The experiment will be important to verify which are the best and worst points to access the network.
Use the “Settings” application
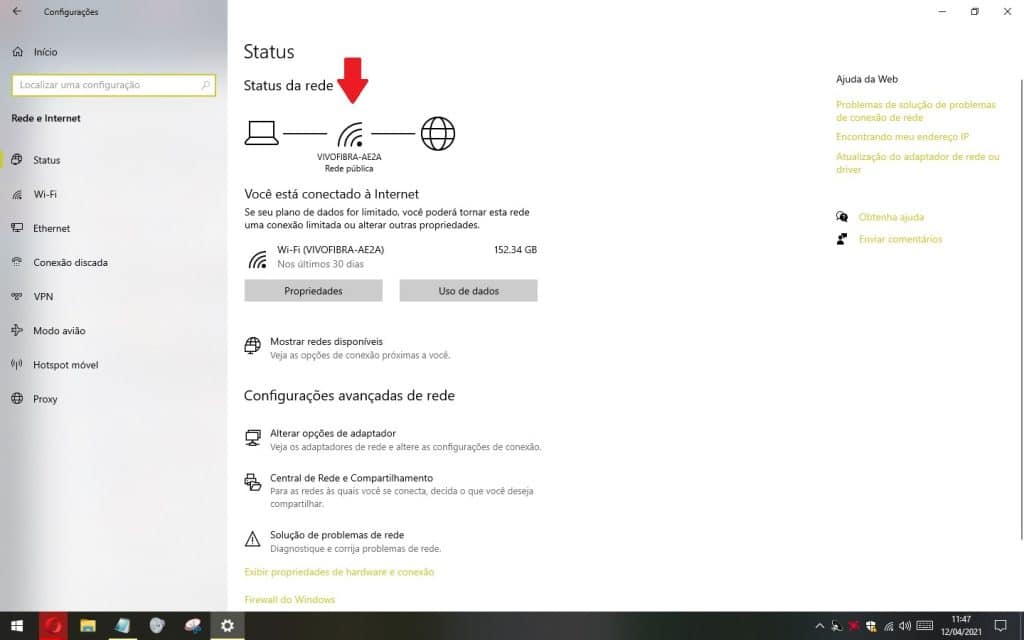
Another alternative is to check the connection status through the Windows 10 “Settings” application. To do this, click on the Windows icon and type “Settings”. The process can also be done by pressing and holding the Windows key on your keyboard and pressing the “i” button.

In the open menu, go to “Network and Internet”.

The status of the connected network will be displayed. Again: the more bars, the stronger the Wi-Fi signal will be.

Read more:
- How to improve your Wi-Fi connection signal
- How to find the password of Wi-Fi networks saved in Windows 10
- How to prioritize Wi-Fi networks with the best signal on Android
Check Wi-Fi signal through Control Panel
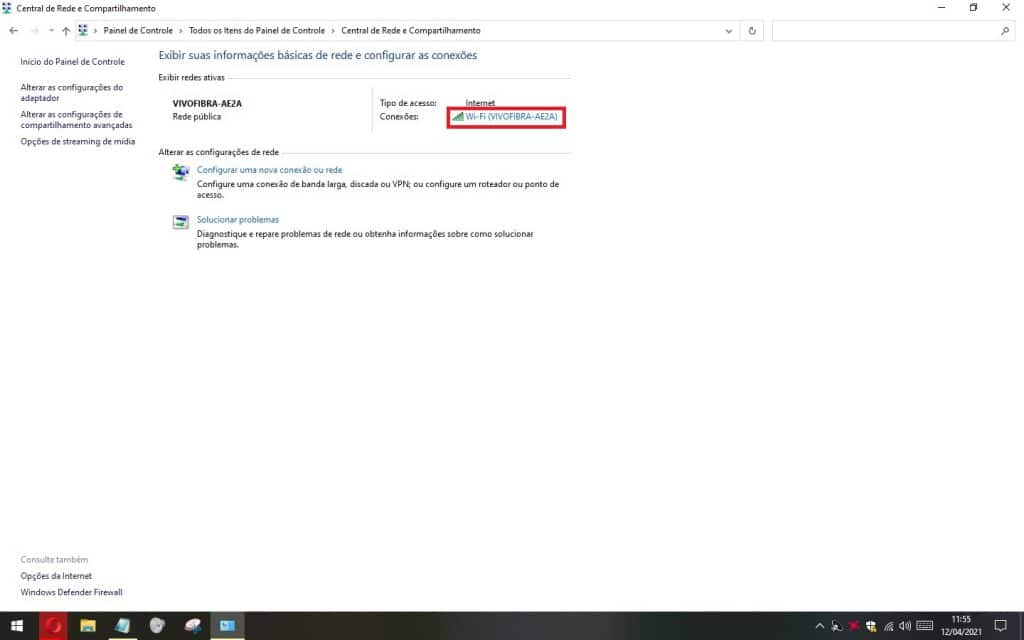
The process is a little more precise than the previous alternatives. To do this, click on the Windows icon and type “Control Panel”.

Go to “Network and Sharing Center”.

Analyze the network you are connected to. If the connection has the five green bars, then the Wi-Fi signal is fine. If the status shows three bars or less, it might be time to consider relocating the router.

Use Windows PowerShell or Command Prompt
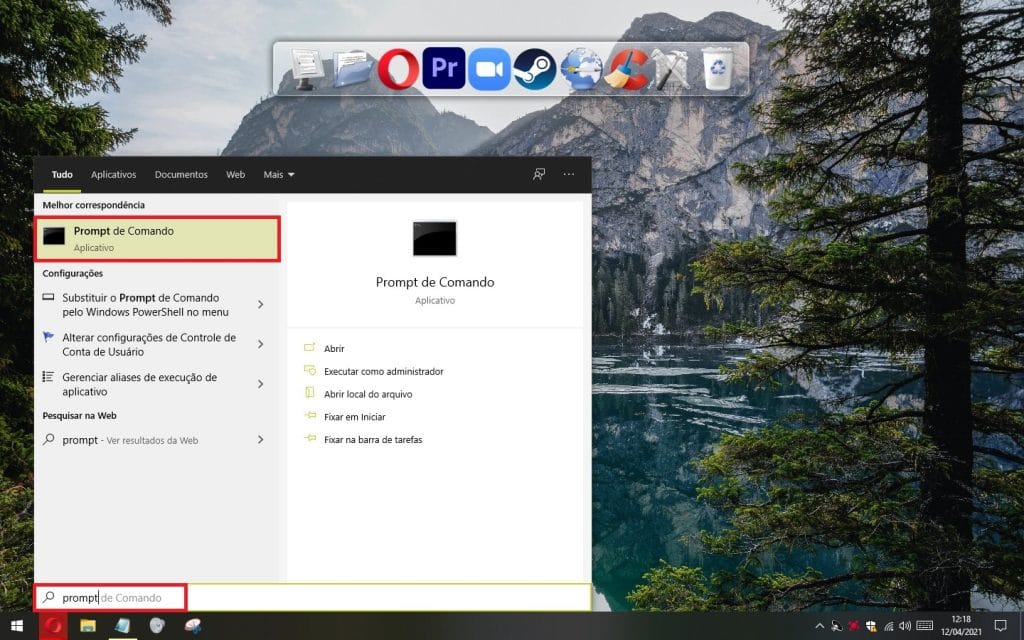
The methods display the network signal as a percentage, which can be much more accurate than the measurements above. Both work with the same step by step. Click on the Windows icon and type “Windows PowerShell” or “Command Prompt.”


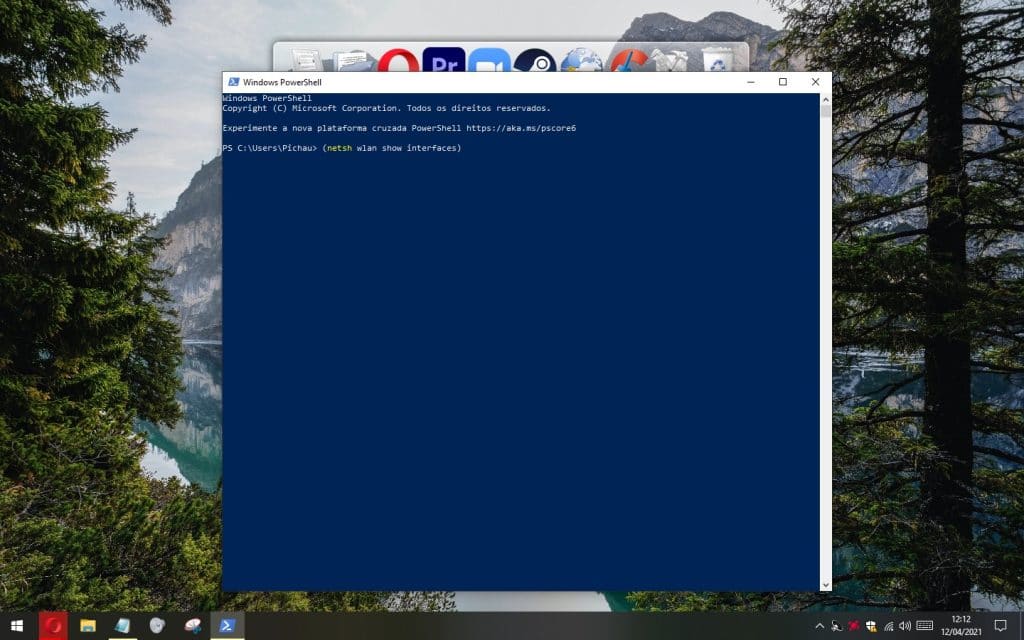
Copy the command (netsh wlan show interfaces) , paste in the chosen tool and press “Enter”.

When doing this, find the “Signal” option and check the percentage. The higher the number, the stronger the Wi-Fi signal received on the device.

Source: How-to Geek